
Pretty as a Peacock!

I've been meaning to show you our little Peacock! And give you tips to make your own costume!!
I began looking for a costume I could make because my mom always made our costumes when I was a child. I also wanted something with pizzazz since this was her first Halloween. But I also realized we needed something functional. We travel between the two grandparents homes on the night of Halloween so I needed something that would be comfortable enough for her to wear for at least 4 hours and something that would work with a car seat. AND of course something that wouldn't break the bank! About a month before Halloween, I settled on the idea of a peacock. I downloaded a few good pictures of peacocks to channel some inspiration, then here's how it came together:
1- purple long sleeve outfit $4
1 - yellow lace tights Etsy $10.00
1 - Orange socks (JC Pennies) came in 6pk of various colors ($4.00)
1 yard - aqua material $3.99
12 - peacock feathers Amazon $10.31
10 - Blue feathers Amazon
1 - Orange socks (JC Pennies) came in 6pk of various colors ($4.00)
1 yard - aqua material $3.99
12 - peacock feathers Amazon $10.31
10 - Blue feathers Amazon
$2.95
1 package of large Velcro squares $2.99
TOTAL: Money spent approximately $38.00, time spent: 2 hours (including purchasing items)
Here's the feathers:


After gathering all the supplies, I began by making the foundation for the feathers. I laid the purple outfit down and cut a piece of sturdy cardboard to cover the area under her shoulder blades to the top of her diaper. I wanted it to be smaller than the outfit so it didn't stick out on the sides or top and show from the front. I used cardboard from a diaper box, but any sturdy cardboard will do. Then I used the aqua material to cover the cardboard (I sewed it, but hot glue would work too). No need to make it too pretty because it won't show that much. Here's what mine looked like:


1 package of large Velcro squares $2.99
TOTAL: Money spent approximately $38.00, time spent: 2 hours (including purchasing items)
Here's the feathers:
After gathering all the supplies, I began by making the foundation for the feathers. I laid the purple outfit down and cut a piece of sturdy cardboard to cover the area under her shoulder blades to the top of her diaper. I wanted it to be smaller than the outfit so it didn't stick out on the sides or top and show from the front. I used cardboard from a diaper box, but any sturdy cardboard will do. Then I used the aqua material to cover the cardboard (I sewed it, but hot glue would work too). No need to make it too pretty because it won't show that much. Here's what mine looked like:
Next, warm up the hot glue gun and begin to position the feathers. I first glued a layer of the aqua feathers to cover the fabric and make a fuller looking base. I made a fan shape and wanted them to rise just above her shoulder line (so they would be visible from the front). It may be easier to lay the aqua board on the actual outfit and then position and cut the stems so you can visualize how tall the feathers should rise. Remember that the stems will be covered, so really lay the hot glue to them so they will stick! After the aqua feathers are glued and cooled, begin positioning the peacock feathers to make a pretty pattern. I did a tall layer and then cut some to make a shorter layer. Lastly, I used a few more aqua feathers (cut in half) to cover the stems. (It would be beautiful to use all peacock feathers, just a little pricey).
Here's what mine looked like:
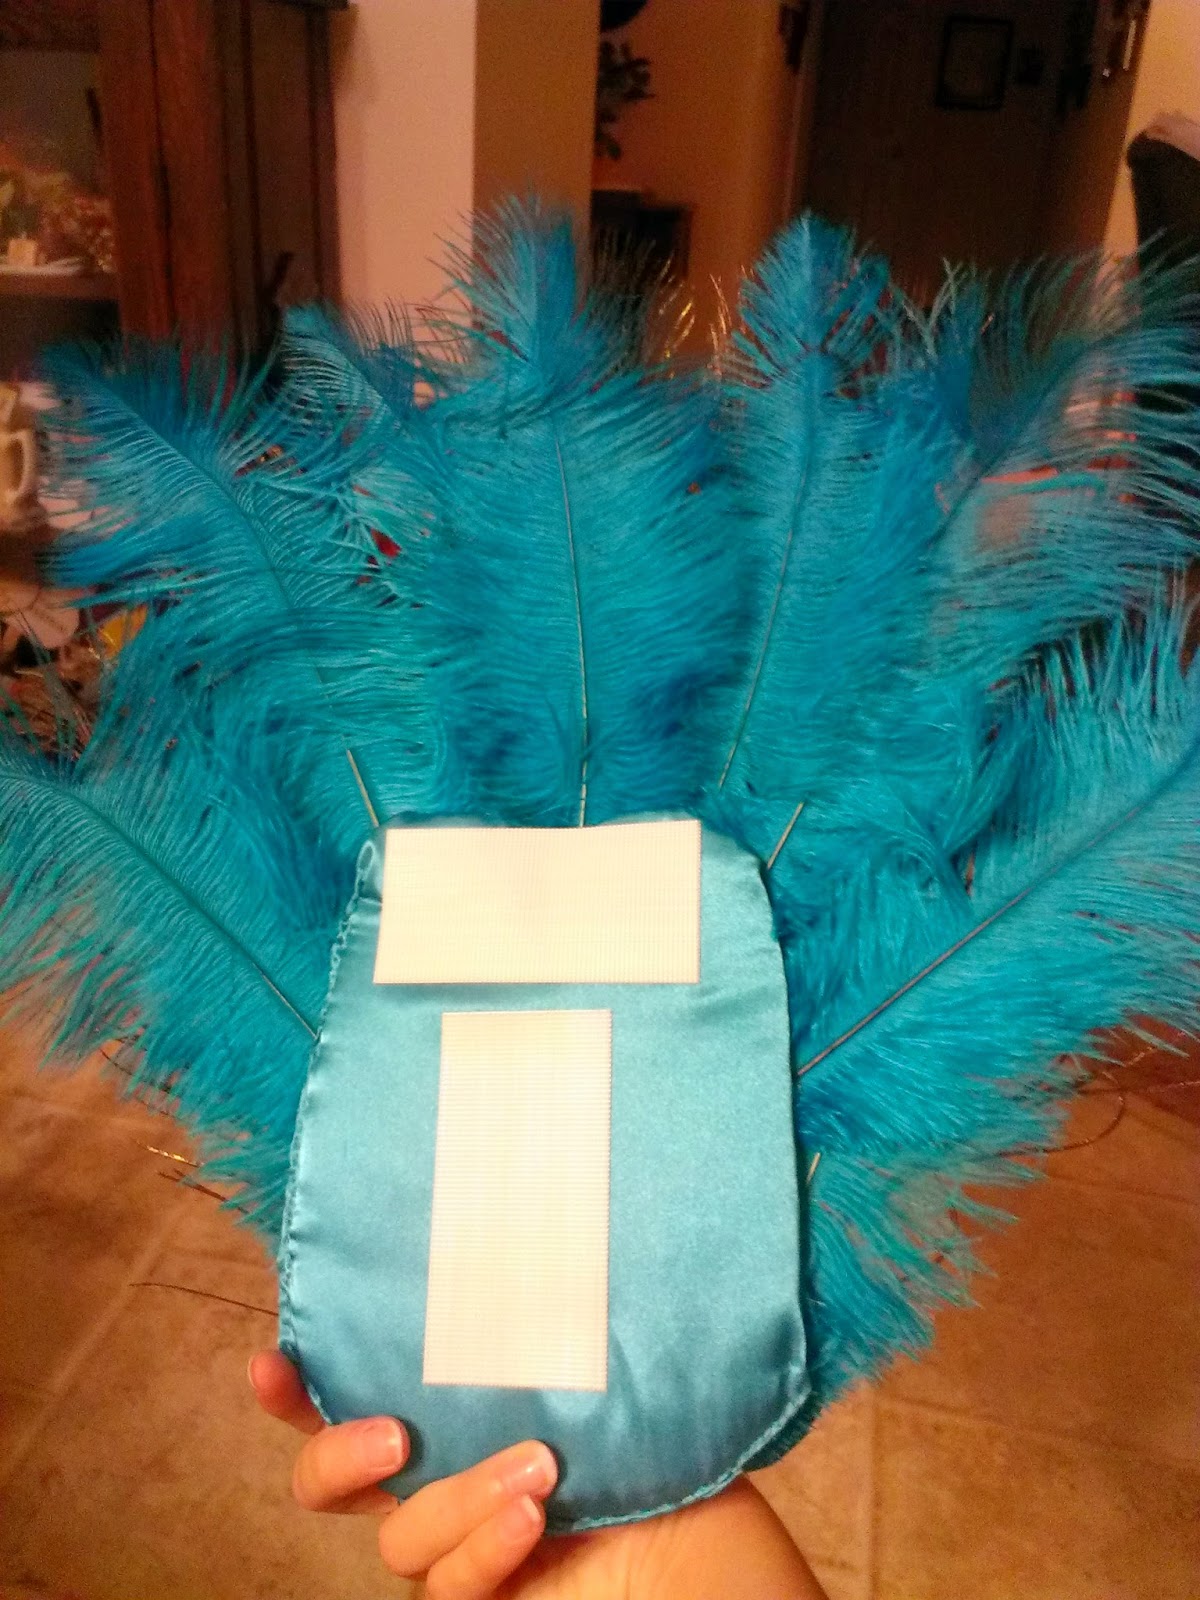
Now you need a way to attach this feathered piece to the outfit. I used large squares of Velcro. I attached the soft Velcro to the purple outfit (couple stitches on each corner to help the sticky self adhesive last through the night) and the other half of the Velcro squares were hot glued to the aqua material.
I used left over feathers to create a headband (but you can purchase cute ones on Etsy or Hobby Lobby too!). Then it was 'Show time'!
Here's the whole costume (our baby was 7 months old crawling but not walking yet). Also- it was cold that night, so I layered thicker white knit tights under the lace tights to provide some warmth.
The feathers are SO pretty!!! Especially in the sun!
Plus, she was comfortable and the back feather piece was just un-Velcro'ed to put her in the car seat.
The costume was a hug hit! She was able to crawl around, go in and out of the car seat without an outfit change!!
She's outgrown the tights and purple outfit, but the feather piece will be used for dress-up for years to come!!!
Hope this has inspired you!!! Please share photos of your little Peacock, Flamingo, or other creation!
No comments:
Post a Comment